Show Off Your Stitches: A Crafter's No-Fuss Guide to Stunning Handmade Photos
You spent three weeks on that chunky knit blanket. You frogged it twice, switched yarn weights, and finally landed on something you're genuinely proud of. Then you snapped a quick photo in your living room, posted it, and... crickets. Sound familiar?
Here's the thing: the gap between how beautiful your handmade work actually is and how it looks in a photo doesn't come down to talent or expensive gear. It comes down to a few small, learnable habits. And once you pick them up, sharing your work starts to feel exciting instead of deflating.
Let's get into it.
Your Smartphone Is Plenty — Seriously
Before you even think about buying a new camera, know this: most of the stunning craft photos you see on Instagram and Pinterest were taken on a smartphone. What separates them from blurry, dull snapshots isn't equipment — it's technique.
Start by cleaning your lens. It sounds almost too simple, but a smudged camera lens kills sharpness before you even press the shutter. Give it a quick wipe with a soft cloth every time you're about to shoot.
Next, lock your focus. On both iPhone and Android, tapping on your subject before shooting tells the camera exactly what to prioritize. If you're photographing a knitted dishcloth, tap on the texture you want sharp. This one habit alone will transform your results.
Finally, turn off your digital zoom. Instead of pinching to zoom in, physically move yourself closer to your subject. Digital zoom degrades image quality in a way that's hard to fix later.
Chase the Light (It's Free and It's Everywhere)
Natural light is your single most powerful tool, and it costs absolutely nothing. The goal is to find soft, diffused light — the kind that wraps gently around your subject without casting harsh shadows.
The sweet spot for most crafters? A spot near a large window, but not in direct sunlight. Direct sun creates blown-out highlights and deep, unflattering shadows that flatten texture — and texture is literally the whole point when you're photographing knits and wovens. Overcast days are actually ideal. That cloud cover acts like a giant softbox, spreading light evenly across everything.
If you only have a window with strong direct light, hang a white sheer curtain or tape a piece of white tissue paper over the glass. It diffuses the light beautifully and costs next to nothing.
Avoid mixing light sources when you can. If you're shooting near a window during the day, turn off your overhead lights. Mixing daylight with warm indoor bulbs creates an orange cast that's tricky to correct and makes your yarn colors look muddy.
Build a Simple Styling Setup
Styling doesn't mean going out and buying a bunch of props. It means being intentional about what's in your frame and what story you're telling.
Start with a clean background. A piece of foam board from the dollar store (white, black, or gray) works perfectly. Wooden cutting boards, a neutral linen tea towel, or even a section of hardwood floor can all serve as beautiful, simple backdrops depending on the mood you're going for. Avoid busy patterns or cluttered surfaces that compete with your actual project.
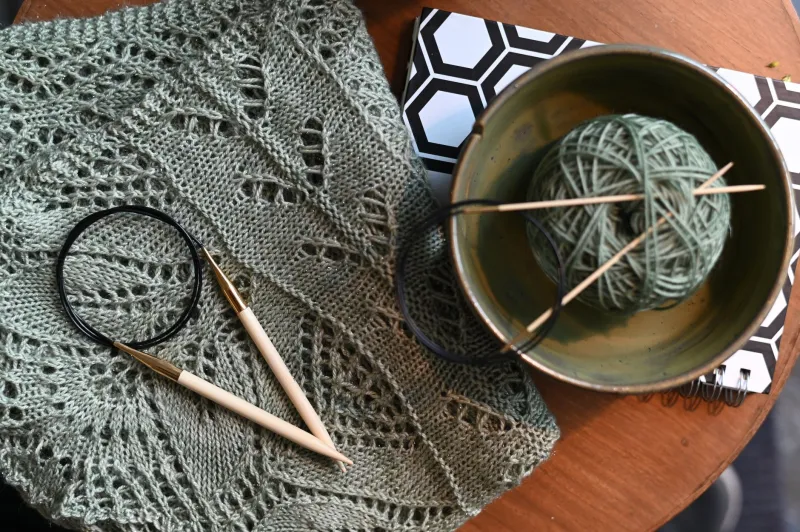
Think about what supports your craft's story. A pair of wooden knitting needles, a skein of coordinating yarn, a cup of coffee, or a few dried flowers can add warmth and context without overwhelming the shot. Keep props minimal — two or three elements max. The handmade piece is always the star.
For flat lays (shooting straight down at your subject from above), arrange your items on the floor or a large table and stand directly above them. Use grid lines on your phone camera to keep things level and balanced. Asymmetrical arrangements tend to feel more natural and editorial than perfectly centered ones.
Angles That Actually Flatter Your Work
Different craft projects photograph better from different angles, and it's worth experimenting rather than defaulting to one approach every time.
Flat lay: Great for finished objects like dishcloths, blankets, shawls, or smaller accessories. Lay your item flat, style it loosely (folded or slightly rumpled often looks better than overly neat), and shoot from directly above.
45-degree angle: This is your everyday workhorse angle. It mimics how we naturally look at objects and works well for mugs of yarn, baskets, finished garments draped over a chair, or any project with height or dimension.
Close-up detail shots: Don't sleep on these. A tight crop of your stitch work, a button detail, or the edge of a beautifully finished seam can be just as compelling as a full shot of the finished piece — sometimes more so. These details tell the story of your craft in a way that wide shots can't.
Editing Basics That Won't Overwhelm You
You don't need Photoshop. The free editing tools built into your phone's photo app — or a free app like Snapseed or Lightroom Mobile — are more than enough.
Here's a simple editing checklist to run through after every shoot:
- Straighten and crop — Level your horizon line and crop out anything distracting at the edges.
- Adjust exposure — If the photo looks dark, bring up the brightness slightly. If it looks washed out, pull it back.
- Boost shadows — Lifting the shadows slightly reveals detail in darker areas without blowing out the highlights.
- Increase clarity or texture — This brings out the tactile quality of yarn and fabric, which is exactly what you want.
- Adjust white balance — If your photo looks too orange or too blue, shifting the temperature slider fixes it fast.
One thing to avoid: over-filtering. Heavy filters change your yarn colors in ways that can actually mislead people about what they're buying or working with. Keep edits natural so your work looks exactly as gorgeous in person as it does online.
Make It a Habit, Not a Chore
The crafters who build the most engaged followings online aren't necessarily the most skilled photographers. They're the most consistent ones. They document their work-in-progress shots, their finished pieces, their yarn hauls, their happy accidents. They let people in.
You don't have to get every photo perfect. You just have to start sharing. Set up a little photo corner in your craft space with good light and a backdrop you like, and make taking a few shots part of your finishing routine. After a few weeks, you'll be genuinely surprised at how much you improve — and how much more connected you feel to your creative community.
Your handmade work deserves to be seen. Now you've got the tools to make sure it is.